How to set up an atrenos server: In this guide, I’m going to show you how to set up and host your own Minecraft server for free using the server host, Aternos. I will also show you how to upload maps as well as create normal survival worlds using this Article!
How to set up an atrenos server
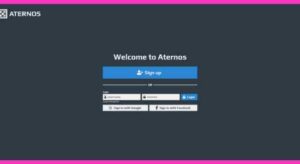
Step 1. To set up your own Minecraft server, you’ll need to start by Sign up for an Aternos account. You can do this by visiting their website. Once you have created an account, you will need to hit the play button at the bottom right of your screen. If you don’t see it right away, try scrolling down until you see it.

Step 2. Once you click on that button, it will take you to a login or signup page. After doing that, it will ask you to create an account with Aeternos or log in to an already existing account if you previously created an account.
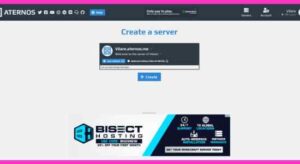
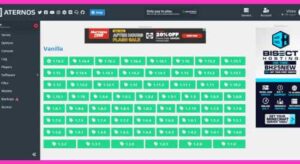
Step 3. After signing up or logging in, you will be taken to your account panel where you can create a server. On the homepage, there will be a green button that says click on “Create”. This will bring up a server profile and another blue button that says “Create.” Click on both to start your new server.
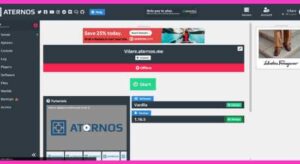
Step 4. If you’re planning on running the latest version of Minecraft in a random vanilla seed, you don’t need to make any changes here. You can just press start and give your friends IP and play with them! If you need to upload a specific map to your server, follow the next session!
Step 5. Maps usually require older versions of Minecraft because they take a huge amount of effort to upgrade with each new update. If the map you’re interested in playing requires a different version of the game, you can click the green “Change” button in the Versions section.
Step 6. After hitting the change button it will bring up a menu of different versions of Minecraft. Choose whatever version you want for the map you plan to play.

Step 7. Once you’ve selected the right version, it’s time to upload your map! To do this you need to click on the “Worlds” option on the left sidebar. This will take you to a new page where you can either reset your world or upload a new one in its place. For the purposes of our tutorial, we’ll show you how to upload a map that requires you to click the orange “Upload” button.
Step 8. When you click on the drop-down it will ask you to upload the map in zip file format or upload the contents of a folder. To do this you need to make sure that you only upload the folder with the map content, otherwise, it will not work. It will look something like the picture below for recently developed maps.
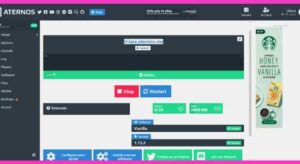
Step 9. Once uploaded you can go back to the homepage and start your server! Once your server is online it will lead you into the map. Keep in mind that sometimes the server takes some time to start up as there may be queues of people to join as well as delays in normal startup. You will receive an off notification once your server is up and running. You can join using the IP address shown in your Servers tab.
I hope you found this blog post helpful!